How to Build Your Own Mobile Proxy Farm: A Step-by-Step Beginner’s Guide
Makale içeriği
- Introduction
- Pre-flight checklist
- Key concepts
- Step 1: design your farm and run the numbers
- Step 2: choose and buy hardware and sims
- Step 3: assemble the rig and wire it up
- Step 4: prepare the server and basic security
- Step 5: configure modems and networking
- Step 6: install and configure 3proxy and iproxy
- Step 7: automate ip rotation and monitoring
- Step 8: test, hand off access, and document
- Step 9: scale, optimize, and go to production
- Quality assurance
- Common mistakes and fixes
- Advanced options
- Faq
- Conclusion
Introduction
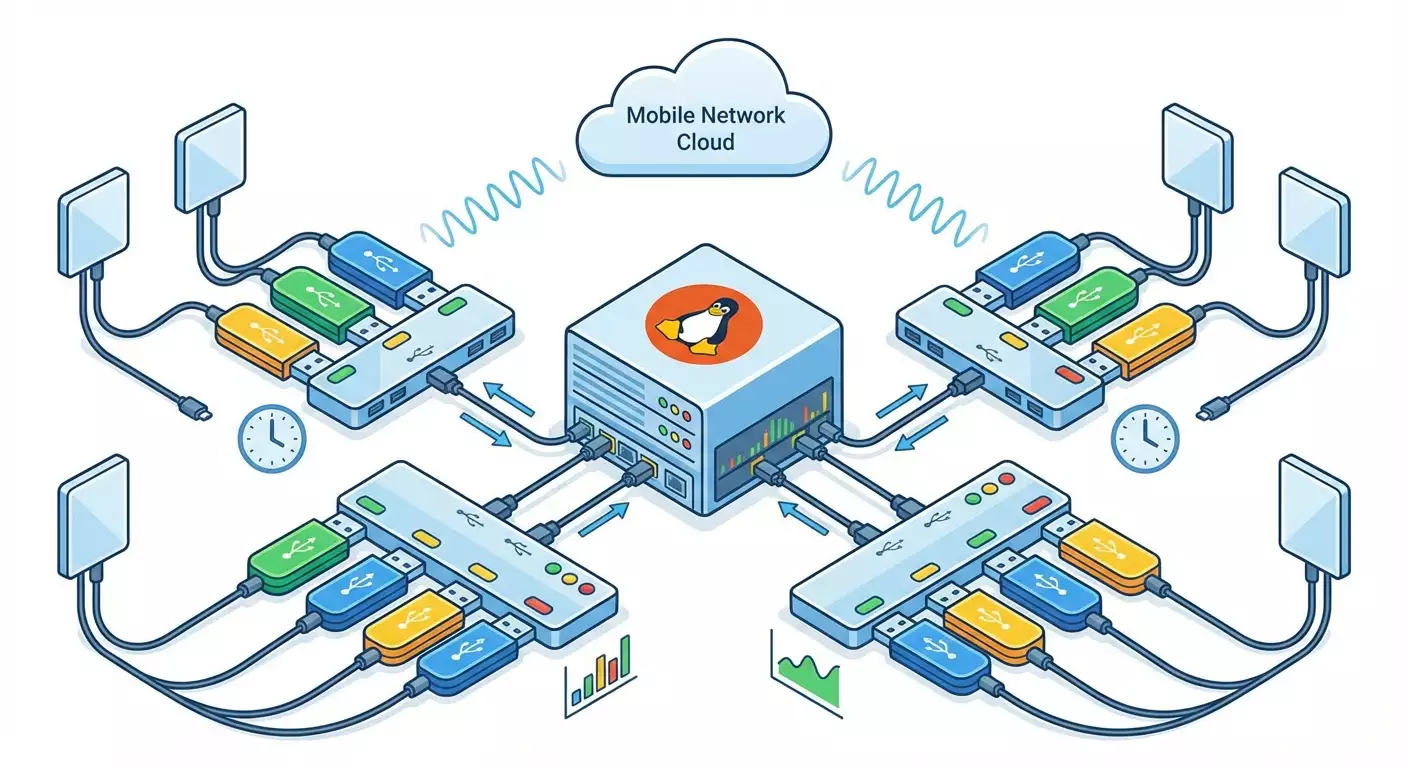
In this step-by-step guide, you’ll build a production-ready mobile proxy farm: assemble hardware, prepare a server, install and configure 3proxy and iProxy, set up IP rotation and monitoring, then verify connection quality and calculate payback. We’ll cover everything from choosing Huawei and ZTE modems to network configuration details so you can confidently get results.
You’ll end up with working HTTP(S) and SOCKS5 proxies with username/password authentication, each exiting to the internet through its own mobile modem and SIM card. You’ll learn how to control IP rotation frequency, track uptime, scale quickly, and calculate ROI and break-even.
This guide works for complete beginners, but we’ve included sections for advanced users too: alternative routing, automation, higher resiliency, TCO calculations, and scaling strategies. We assume you’re comfortable on a computer and ready to run terminal commands. Prior Linux admin experience isn’t required—every step is explained in detail.
Before you begin, it helps to know a few network basics: IP address, interface, gateway. If those are new to you, don’t worry—we’ll clarify as we go.
Time required: procurement and prep typically take 1–7 days depending on delivery; assembling the rig and base configuration 4–8 hours; testing 1–2 hours. Budget another 2–4 hours for automation and monitoring. In 1–3 days you’ll have a working farm.
Tip: If you’re unsure how big to start, begin with 2–4 modems. You’ll iron out the process without overspending and immediately apply lessons when you scale.
Pre-flight checklist
Before assembly, make sure you have everything. This saves hours and prevents avoidable pauses.
Tools and access you’ll need
- Access to a server running Ubuntu (a local mini PC, desktop, or a remote server with USB-connected hardware).
- Administrator rights (sudo) on the server.
- An account for purchasing hardware and SIM cards.
- A layout plan: where the rig will sit, how you’ll power and cool it.
Server requirements
- CPU: 2 cores or more.
- RAM: 4 GB minimum; 8 GB preferred for 10–20 modems.
- Storage: SSD 120 GB+.
- USB ports: 4+, ideally 8–16 via externally powered USB hubs.
- Network: stable Ethernet or Wi‑Fi for management; gigabit Ethernet preferred.
What to download and install
- OS: Ubuntu Server 22.04 or 24.04 LTS.
- 3proxy — to serve HTTP(S)/SOCKS5 proxies.
- iProxy — a manager for mobile proxies and automated IP rotation (optional helper).
- ModemManager, libqmi, usb-modeswitch — for working with USB modems.
- Networking tools: iproute2, nftables or iptables, curl, dig, tcpdump, cron.
- Optional: tmux or screen for resilient terminal sessions.
Backups and rollbacks
Keep backups simple at the start: save your 3proxy configuration and any rotation scripts. Store duplicates in a separate config folder and on external media.
⚠️ Important: Store your proxy usernames and passwords separately and encrypt them. If they’re compromised, change passwords and update configs immediately.
Tip: Create a backup folder in your home directory and, after each change, copy configs there with a date stamp, e.g., backup/2025-01-15/3proxy.cfg.
Key concepts
Let’s anchor the essentials in plain English so the next steps click.
- Mobile proxy — an HTTP(S) or SOCKS5 server that routes your traffic to the internet through a mobile network (cellular carrier). The external IP is typically dynamic and changes when the modem reconnects.
- Modem — a USB device (e.g., Huawei E3372, ZTE MF79) that connects to the mobile network. One modem equals one mobile internet line.
- SIM card — a carrier card inserted into a modem that defines the plan, limits, data allowance, and IP behavior.
- IP rotation — changing the external IP by reconnecting the modem or switching the cellular node. Controlled by software and schedules.
- Interface — a network “port” in the OS, such as usb0, wwan0, eth0. Each interface maps to a specific modem or network link.
- Binding — pinning a proxy’s outbound traffic to the right interface so each proxy uses “its own” modem.
- Policy routing — routing policies by ports or packet marks to split traffic across interfaces.
Important nuance: mobile carriers often use CGNAT. Your “external” IP may be from the carrier’s public pool, but most services detect it as mobile traffic—which is exactly why these proxies are valuable for certain testing, localization, and automation tasks.
Tip: Plan rotation frequency conservatively. Rotating too aggressively can trigger carrier throttling or instability.
Step 1: Design your farm and run the numbers
Goal
Decide how many modems and SIMs you need, which server to use, how you’ll rotate IPs, and what your expected payback looks like.
Step-by-step
- Define the number of concurrent proxies. Example: if you need 10 separate streams, plan for 10 modems and 10 SIMs.
- Pick an IP rotation interval. Start with 15–30 minutes for stability. Tune later for your use case.
- Choose an architecture: one server plus multiple powered USB hubs with modems. For 10 modems, a mini PC with 8 GB RAM is enough.
- Size power delivery: each USB modem can draw up to 0.5 A at peak. Use hubs with 5 V PSUs and current headroom.
- Estimate CAPEX: server, modems, hubs, antennas, SIMs. Example: server $300, 10 modems × $30 = $300, hubs $60, SIMs $20 to start, total ~$680.
- Estimate OPEX: monthly carrier fees (e.g., 10 SIMs × $5–10), electricity (small), management internet. Example: 10 SIMs × $7 = $70/month.
- Forecast value or savings: why you need the proxies and how they pay back. Example: if each proxy saves or earns $15/month, 10 proxies = $150/month.
- Calculate payback: ROI = (monthly benefit − OPEX) / CAPEX. Example: (150 − 70) / 680 ≈ 0.117 → around 8.5 months to break even.
- Account for risk: SIM replacements, defective modems, downtime. Add 10–20% budget buffer.
- Plan for scale: a 20–40 modem rack needs better cooling and cable management. Plan shelves, cables, and labeling now.
⚠️ Important: Use mobile proxies only within the law and your carrier contracts. Abuse of traffic and any illegal activity is prohibited. Follow the rules of services where you test integrations.
✅ Checkpoint: You have a table listing modems and SIMs, an IP rotation plan, and a rough ROI estimate. You know how many proxy ports you need and what to buy.
Common pitfalls and fixes
- Unclear revenue model — start with 2–4 modems and validate assumptions.
- Hard to estimate data usage — monitor daily for the first 2 weeks and pick a plan accordingly.
- Unsure about server load — go with headroom: 8 GB RAM and SSD for stability.
Step 2: Choose and buy hardware and SIMs
Goal
Select modem, hub, antenna, and SIM models that deliver stable links and flexible IP rotation.
Step-by-step
- Pick modems. Reliable options: Huawei E3372h, E3372s, ZTE MF79, ZTE MF833, and similar LTE USB models. Use the same model per batch to simplify ops.
- Check operating modes: Hilink (with web UI, NAT) vs Stick/NCM (OS network interface). Stick/NCM is convenient for managed rotation, but Hilink also works.
- Buy powered USB hubs. For 10 modems, 2×7-port hubs with 5 V 3–5 A PSUs work well. Quality power supplies matter.
- Consider antennas. Stock ones often suffice, but if coverage is weak, use antennas with CRC9 or TS9 connectors matching your modem.
- Get quality USB 2.0 cables, short (0.3–0.5 m) to reduce loss and noise.
- Buy SIM cards. Look for stable LTE, allowed use cases, and no strict modem bans. Confirm tethering and data caps.
- Add cooling: compact 80–120 mm fans with grills to cool the entire stack.
- Prepare labels: stickers for modems and SIMs with numbers and ports. This speeds up support.
Tip: If unsure about models, buy 1–2 from different brands and test in your real signal conditions. Then purchase the rest of the batch in the winning model.
✅ Checkpoint: You’ve received modems, hubs, PSUs, cables, SIMs, antennas, and cooling. You have IMEIs, serials, and labeled SIMs ready to bind to ports.
Common pitfalls and fixes
- Modems overheat — add airflow and space between units. Consider small aluminum heatsinks.
- Hub becomes unstable under load — upgrade the power supply or switch to a reputable hub.
- Weak signal — move the rig, use an external antenna, or extend the modem closer to a window.
Step 3: Assemble the rig and wire it up
Goal
Assemble and power the farm so each line and power rail runs stable and predictable.
Step-by-step
- Place the server in its permanent location and connect it to power and the network.
- Position USB hubs for easy service access with no cable strain.
- Connect hubs to the server with short, quality USB cables.
- Connect power supplies to hubs and switch them on.
- Insert SIMs into modems. Double-check orientation.
- Label each modem externally (e.g., 1..10) and its matching SIM.
- Plug modems into hubs one by one, watching indicators. Give each 10–20 seconds to initialize.
- Arrange cooling: set fans so air flows along rows of modems. Avoid blowing directly into ports.
- Bundle and tie cables with a little slack for service operations.
Tip: Don’t fill every hub port from day one. Leave one spare port per hub for troubleshooting and temporary gear.
✅ Checkpoint: The server sees hubs and modems. When plugging in one at a time, LEDs are stable, no overheating, no sharp cable bends. Noise is acceptable and cooling works.
Common issues and fixes
- Modem blinks and disappears — switch hub ports, try another cable, check the hub power supply.
- Fan noise is high — lower RPMs or add more fans running slower.
- Hub not detected — connect directly to the server, check cable and port, replace the hub PSU.
Step 4: Prepare the server and basic security
Goal
Install and update the OS, enable basic protection, and set up tools for working with modems.
Step-by-step
- Install Ubuntu Server 22.04 or 24.04 LTS; create a sudo user.
- Update the system: run sudo apt update, then sudo apt upgrade -y.
- Install tools: sudo apt install -y modemmanager usb-modeswitch libqmi-utils iproute2 nftables curl tcpdump cron tmux.
- Enable ModemManager: sudo systemctl enable --now ModemManager.
- Set up a basic nftables firewall: allow SSH and future proxy ports. Create a simple rule set that accepts established connections and blocks unnecessary traffic.
- Create a non-privileged user to run 3proxy: sudo adduser --system --group --no-create-home proxyuser.
- Create config directories: sudo mkdir -p /etc/proxyfarm /var/log/proxyfarm /var/log/3proxy.
- Enable unattended security updates: sudo apt install -y unattended-upgrades, then activate it.
- Sync time: sudo apt install -y chrony and verify the clock is synchronized.
Tip: Use tmux during long setups. Start tmux first so a dropped SSH session won’t interrupt your work.
✅ Checkpoint: lsb_release -a shows the right Ubuntu version; ModemManager is active; config and log folders exist; SSH is stable; the firewall is on; time is synced.
Common pitfalls and fixes
- SSH is unreachable — review firewall rules and the network interface. Roll back changes if you locked yourself out.
- ModemManager won’t start — restart it with sudo systemctl restart ModemManager and check journalctl -u ModemManager.
- System reboots due to USB power — move modems to another hub, check the hub’s PSU.
Step 5: Configure modems and networking
Goal
Make each modem bring up its own network connection and route traffic through the correct interface for each proxy port.
Step-by-step
- Determine how the modem appears in the OS. Plug in a modem and list interfaces. In Hilink mode you’ll see an interface like ethX or enX with a local gateway. In Stick/NCM mode you’ll see wwanX or usbX.
- If Hilink suits you, leave it. If you need Stick/NCM, use the vendor’s tools to switch modes—or buy modems preconfigured. Avoid firmware flashing unless you know what you’re doing.
- Check network registration: for Stick/NCM modes, use ModemManager. First list modems. Find the modem index (e.g., 0). Bring up a connection with your carrier APN. Get the correct APN from your carrier.
- Verify IP assignment: confirm that wwan0 or usb0 has an address and a default route for that interface.
- Connect modems one by one. After each, confirm a new interface appears (wwan1, usb1, etc.) and that it registers on the network. For Hilink, ensure each interface has its own local gateway (e.g., 192.168.8.1, 192.168.9.1, depending on model).
- Set unique route metrics so your server’s primary route isn’t hijacked by modems. Keep the server’s default route as the top priority. Use policy routing for modem-bound traffic.
- Create per-modem routing tables. Suppose you have usb0 and usb1. Assign a dedicated table to each. Add default routes pointing at each interface’s gateway.
- Mark packets by proxy port. For example, send port 31000 via usb0 and 32000 via usb1. Create marking rules for inbound packets on those ports and ip rule entries to direct marked packets to the corresponding routing tables.
- Persist rules and load them at boot. Use a systemd unit or an /etc script to apply them on reboot.
- Test routing without the proxy. Start a temporary listener and generate traffic to that port on localhost; use tcpdump on usb0 to see outbound packets following your rule. Repeat for usb1.
Alternative path
You can bind the outbound interface directly in 3proxy (the -e parameter), which can simplify or replace port-based policy routing. Policy routing remains more universal and decoupled from 3proxy config.
Tip: For many modems, automate rule generation with a simple script. Suggested structure: port = 30000 + modem number; interface = usb + modem number.
✅ Checkpoint: Each modem has its own routing table and rules. Tests show packets to port 31000 go out via usb0, and 32000 via usb1. The server’s main connection stays intact if a modem is unplugged.
Common pitfalls and fixes
- Server internet disappears — temporarily remove policy routing rules, restore the default route, and fix metrics.
- Interfaces “jump” names — pin stable names via udev by VID/PID or by USB port path.
- No IP on the interface — verify APN and network registration; restart ModemManager or replug the modem.
Step 6: Install and configure 3proxy and iProxy
Goal
Deploy the proxy server for HTTP(S)/SOCKS5 with authentication and bind each proxy port’s outbound traffic to its modem. Prepare iProxy for easier management and automated rotation.
3proxy: step-by-step
- Install 3proxy. On Ubuntu, build from source or use a prebuilt binary. Place it in /usr/local/bin and create a systemd unit to run as proxyuser.
- Create /etc/proxyfarm/3proxy.cfg. Set global options: auth strong, user/password list, log path, log rotation, timeouts.
- Add proxy services. For each modem, create an HTTP proxy on ports 31000, 32000, 33000, etc. If using port-based policy routing, listen on 0.0.0.0 with standard options. If binding in 3proxy, use -e with the modem interface IP.
- Enable CONNECT and error logging, and set /var/log/3proxy with proper permissions for proxyuser.
- Create a 3proxy.service systemd unit with ExecStart pointing to the config, User=proxyuser, Group=proxyuser, Restart=always, and a high LimitNOFILE (e.g., 65535).
- Start the service: sudo systemctl daemon-reload and sudo systemctl enable --now 3proxy.
- Verify ports are listening and auth works. Test several ports mapped to different modems.
iProxy: step-by-step
- Install iProxy as an optional manager. It helps control modem profiles, automate IP rotation, and provides a convenient control layer. Place the binary in /usr/local/bin and create /etc/proxyfarm/iproxy for configs.
- Initialize its config. Run the init command, pick the config directory, set the run user and log format. Tell it 3proxy handles ports while iProxy handles rotation and monitoring.
- Add modems to iProxy. One by one, select usb0, usb1, etc., and set for each: APN, connection timeouts, assigned proxy ports, and the rotation command (Hilink via the modem’s HTTP API or toggling the interface; Stick/NCM via ModemManager reconnect).
- Configure rotation triggers: by schedule (e.g., every 20 minutes), by request count, by response code, or manual. Start with 15–30 minutes on a schedule.
- Enable health checks: periodic HTTP requests through each port. If a check fails, iProxy should reconnect and log it.
- Create a systemd unit (e.g., iproxy.service) with User=proxyuser and Restart=always. Pass paths to configs and logs in ExecStart.
- Start iProxy and ensure it sees all modems and rotates without interfering with 3proxy.
Tip: Begin simple—port-based policy routing and 3proxy without -e. Once stable, layer on alternative bindings or extra tuning.
✅ Checkpoint: 3proxy is running, ports are listening, auth works. iProxy sees all modems and rotates on schedule. Port-based routing persists across reboots.
Common pitfalls and fixes
- 3proxy won’t start — check permissions on configs/logs, run it manually to view errors, fix typos.
- Ports already in use — change port numbers or stop the process occupying them.
- iProxy can’t see a modem — verify the interface exists, user permissions, and access to ModemManager or Hilink API.
Step 7: Automate IP rotation and monitoring
Goal
Create reliable, hands-off IP rotation and automatic recovery from failures.
Step-by-step
- Pick a rotation strategy: by time (every N minutes), request volume, or manual command. We recommend 20 minutes overnight and 10–15 minutes during the day only if needed.
- For Stick/NCM modems, rotate via ModemManager: on schedule, disconnect and reconnect that modem’s session. Add a 5–15 second gap between commands.
- For Hilink, use a soft data toggle: disable mobile data, then enable. If the model supports API calls, do this via iProxy or your script.
- Stagger rotation with random delays so modems don’t flap at once.
- Add availability checks: every 30–60 seconds verify each proxy port authenticates and returns an external IP (use any IP-check service). On three consecutive failures, trigger a local interface restart.
- Log every rotation: time, modem, old/new external IP, downtime. This helps tune quality and talk to providers when needed.
- Set alerts: if a modem has been down for X minutes, send an email or messenger notification via cron and your notifier of choice.
Tip: Over-rotation reduces stability. Start at 20 minutes and only move to 10–15 minutes if your use case demands it.
✅ Checkpoint: Rotation fires on schedule; proxies recover in 15–60 seconds; monitoring records IP changes and prevents prolonged silent failures; alerts arrive when a modem is down.
Common pitfalls and fixes
- Rotation “hangs” the interface — increase delays between down/up steps.
- Frequent modem flapping — check hub power, replace the cable, reduce rotation frequency.
- IP doesn’t change — lengthen the pause before reconnect, move the modem, try another band or carrier.
Step 8: Test, hand off access, and document
Goal
Confirm every proxy works, is correctly bound to its modem, and can be safely handed over to users or services.
Step-by-step
- Prepare a proxy list in host:port:login:password format. Example: 192.0.2.10:31000:user1:pass1, 192.0.2.10:32000:user2:pass2, etc. Use your server’s external IP as the host.
- Test authentication on each port. Use any HTTP client or curl with credentials. Confirm fast responses and no access errors.
- Verify port-to-modem binding. Generate simultaneous traffic on 2–3 ports and run tcpdump on usb0, usb1 to confirm egress via the intended interfaces.
- Verify IP rotation. Record the IP before rotation, wait for it to rotate, and confirm it changes.
- Test resilience by unplugging one modem. Ensure other proxies keep working.
- Prepare user docs: how to connect, any restrictions, and where to get support.
Tip: Standardize usernames like user01, user02, etc., and generate random passwords. This makes access rotation and support easier.
✅ Checkpoint: All proxies respond; rotation changes external IPs on schedule; unplugging one modem doesn’t affect the rest; user documentation is ready.
Common pitfalls and fixes
- Some ports don’t respond — check the 3proxy config and listening ports, and verify the firewall allows traffic.
- Auth works but no traffic flows — review port-based policy routing; ensure the corresponding routing table exists and is active.
- High latency — check signal quality, reposition modems, improve cooling, or replace hub/PSU.
Step 9: Scale, optimize, and go to production
Goal
Move from pilot to production, add modems, increase stability and predictability, and formalize operations.
Step-by-step
- Standardize port mapping. For example: modem #1 = ports 31000–31001 (HTTP and SOCKS), modem #2 = 32000–32001, etc. It helps support.
- Automate config generation. Template 3proxy and use a script to inject ports and users. Do the same for policy routing and iProxy.
- Distribute power in groups: keep 6–8 modems per PSU to avoid voltage sag. Add a UPS for the server and hubs.
- Add graphing/monitoring: ping, port availability, rotation frequency, ambient temperature at the rack. Build a dashboard.
- Optimize rotation: find the lowest frequency that still meets your IP change needs without hurting stability—usually 10–30 minutes.
- Review the economics. Track active ports, uptime, success rate, and per-SIM data usage. Compare to your ROI plan and adjust the number of modems if needed.
- Plan SIM replacement: keep spares and a process for reissues after blocks or failures. Track IDs and numbers in an inventory system.
- Write runbooks: “how to add a modem,” “how to replace a SIM,” “how to swap a hub,” “how to update 3proxy,” “how to verify routing,” and “how to debug rotation.”
Tip: Beyond 20–40 modems, split across multiple servers or use USB PCIe cards with dedicated controllers to distribute USB bus load.
✅ Checkpoint: The farm consistently supports the target number of ports; incidents are rare and auto-recovered; reports show predictable metrics; adding a new modem takes 15–20 minutes.
Common pitfalls and fixes
- USB bottlenecks — spread modems across hubs and controllers; shorten cables.
- High SIM data usage — analyze traffic, reduce rotation frequency, optimize health checks.
- Config sprawl — store configs in version control with templates and environment variables.
Quality assurance
Checklist: what should work
- The server is stable and reachable via SSH.
- Each modem registers on the network and gets an IP.
- 3proxy listens on planned ports and authenticates users.
- Policy routing splits port traffic across modem interfaces.
- iProxy rotates on schedule and writes logs.
- Monitoring tracks proxy availability and sends alerts.
How to test
- Check each proxy port: send an authenticated request and confirm a valid response with no timeouts.
- Verify routing: run parallel requests to 2–3 ports and observe traffic on different interfaces with tcpdump.
- Verify rotation: wait for a rotation event and compare external IP before and after using any IP-check service.
- Test resilience: unplug one modem and confirm other ports keep working while monitoring alerts on the failure.
Success metrics
- Traffic resumes 15–60 seconds after rotation.
- Port availability success rate: 99%+ over 24 hours.
- Average response latency through proxy: acceptable for your use case (record a baseline at launch).
Tip: Capture key metrics daily at the same time. It makes regressions obvious.
Common mistakes and fixes
- Issue: Proxy authenticates, but no traffic. Cause: Port-based policy routing not set or not applied. Fix: Verify packet marking and ip rule; ensure routing tables have a default route via the modem interface.
- Issue: All connections drop suddenly. Cause: Hub power supply voltage sag under load. Fix: Use a higher-quality PSU, spread modems across hubs, and avoid simultaneous rotations.
- Issue: IP doesn’t change on rotation. Cause: Carrier holds the session; pause too short. Fix: Increase delay between down/up, test day vs night, move location, or try another carrier.
- Issue: Interface names change after reboot. Cause: Dynamic naming. Fix: Pin names with udev rules by USB port path or a unique identifier.
- Issue: Modems run hot. Cause: Dense placement and poor airflow. Fix: Add spacing, active cooling, heatsinks, and quality hubs.
- Issue: Users report periodic timeouts. Cause: Synchronized rotation across modems. Fix: Stagger schedules and add random delays.
- Issue: Logs fill the disk. Cause: Verbose logging without rotation. Fix: Enable logrotate and cleanup; move logs to a separate partition if needed.
Advanced options
Power user settings
- Alternative binding: combine policy routing and 3proxy’s -e parameter as a safety net for complex cases.
- Modem grouping: create pools and switch ports between pools on the fly for balancing.
- Signal quality control: periodically record RSSI/RSRP via ModemManager to spot weak spots.
Optimization
- Lower latency: shorten USB cables, move modems closer to windows, use external antennas and ferrite filters.
- Power stability: add a UPS, split hub power across separate circuits, monitor PSU temperatures.
- Reduce server load: tune 3proxy timeouts, raise nscache, and use SSDs with strong IOPS.
What else to consider
- Network segmentation: move management to a separate VLAN or subnet to isolate control traffic.
- Accounting and billing: track usage per user and apply rate/session limits if you share access.
- Rollback scripts: a script to reset routing rules to a safe baseline if something goes wrong.
⚠️ Important: Don’t use the farm to bypass restrictions in ways that violate laws, carrier agreements, or platform terms. Stick to ethical use cases: testing, localization, and quality assurance.
Tip: Keep thorough inventory: modem, SIM, port, interface, location, purchase date. It saves time during incidents.
FAQ
- How many modems per server? Safely start with 10–20 per host with 8 GB RAM and quality hubs. Scale out to a second server afterward.
- How often should IPs rotate? For stability, start at 15–30 minutes. If needed, try 10–15 minutes and watch error rates.
- Which modems are best? Popular and reliable: Huawei E3372 and ZTE MF79/MF833. Use one model per batch for uniformity.
- Do I need static IPs? No. Mobile proxies are valued for dynamic IPs and mobile ASN. Static IP isn’t required here.
- Can I combine modems for higher speed? Not typically for proxy use. Stability and predictable rotation are more important.
- How do I know if the carrier is throttling? Track speed and latency per modem, compare by time of day and location changes.
- What if a SIM gets banned? Keep spares, maintain a clean traffic profile, reduce rotation frequency, or switch carriers if needed.
- Can I do this without iProxy? Yes. 3proxy + rotation scripts via ModemManager or Hilink API are enough. iProxy just simplifies ops and monitoring.
- How do I calculate payback? Compare monthly benefits to OPEX and divide CAPEX by net monthly profit to get time to break even.
- Should I log access? Yes. Log access and rotations. It helps with debugging and provides an audit trail.
Conclusion
You’ve gone end-to-end: designed a mobile proxy farm, selected and assembled hardware, prepared the server and basic security, configured modems and routing, deployed 3proxy and iProxy, enabled rotation and monitoring, tested functionality, and calculated payback. You now have a practical, repeatable process and a working infrastructure you can scale.
Next, grow along three axes: stability (cooling, power, monitoring), manageability (config templates, inventory, automation), and economics (optimal SIM plans, justified rotation frequency, scaling with proven demand). Add redundancy and runbooks—and your farm becomes a predictable, manageable asset.
Tip: Do monthly maintenance: dust, fasteners, cable and hub condition, OS and config updates. This dramatically reduces unexpected downtime.