How to assign a metric to a connection

In Windows 10, if you have a device with more than one network adapter (such as Ethernet and Wi-Fi), each interface gets a priority value automatically based on its network metric, which determines the primary connection your device will use to send and receive network traffic.
While, for the most part, Windows 10 does a pretty good job of choosing the optimal connection for network access, sometimes you may need to manually adjust the order of your network adapters. For example, if you want to use Wi-Fi over Ethernet when both adapters are connected to a network.
You can disable adapters that you are not using, but this may not be the best solution, since you may need them as backups. Instead, a simpler solution is to set up an interface metric to specify in which order your device should use each network adapter that you can use using Control Panel and PowerShell.
In this Windows 10 guide, we'll walk you through the steps to re-prioritize your network adapter to stay connected using your preferred adapter when using multiple interfaces.
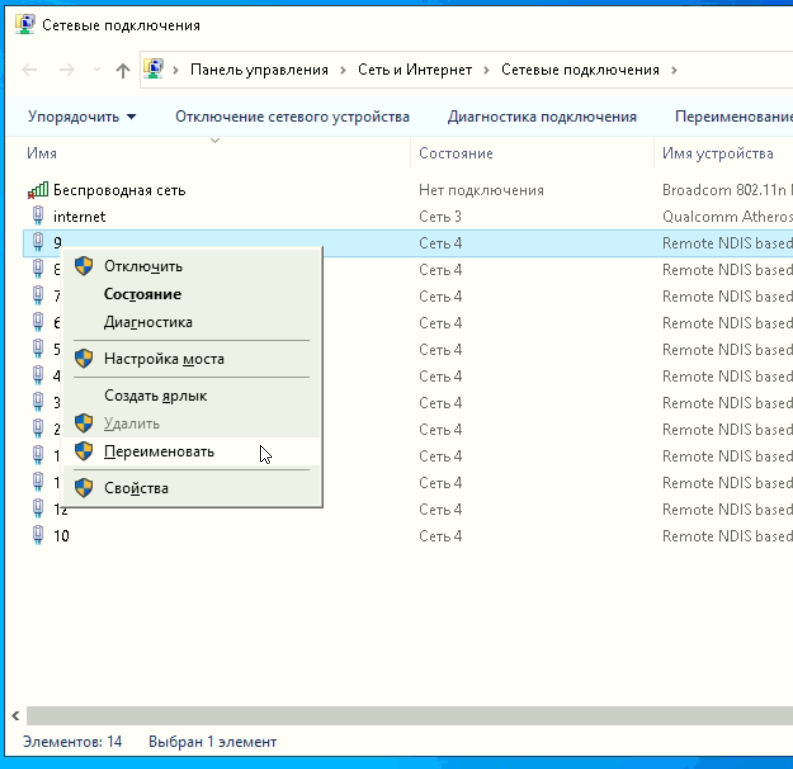
Opening network connections. In the search bar or in the menu & ldquo; Run & rdquo; (run by pressing Win + R) enter the command ncpa.cpl and press Enter. Or like this
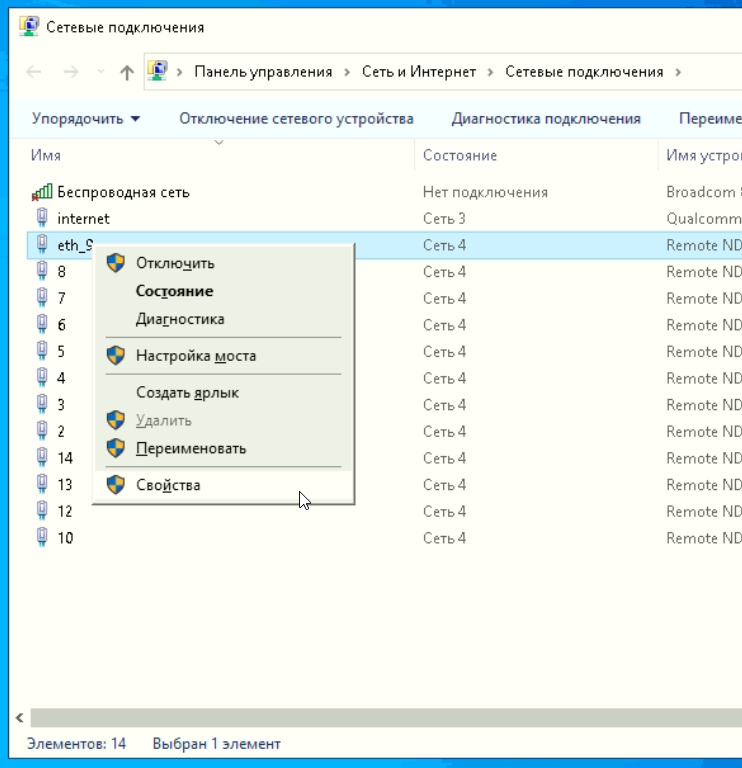
Rename the connection in accordance with the address so that in case of problems we can quickly find the problematic connection.
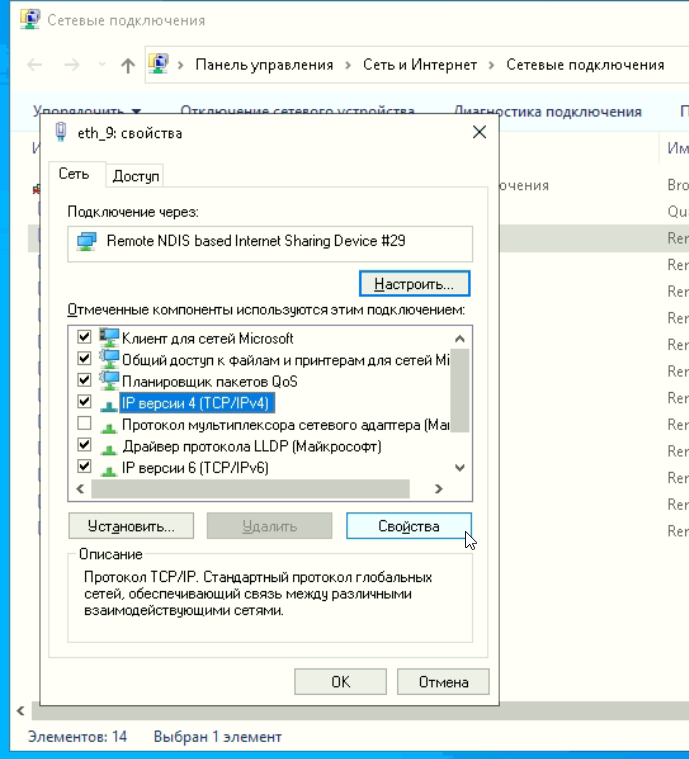
Opening connection properties
Select in the list "IP version (TCP / IPv4)" and click Properties
In the window that opens, click Advanced
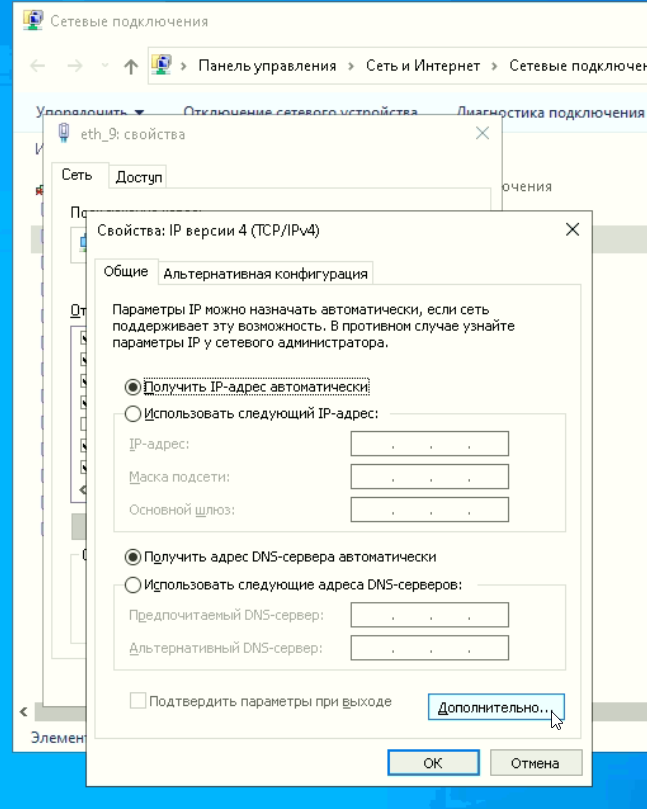
Uncheck the `` Automatic metric assignment '' checkbox and put the value 5000 in the field below.
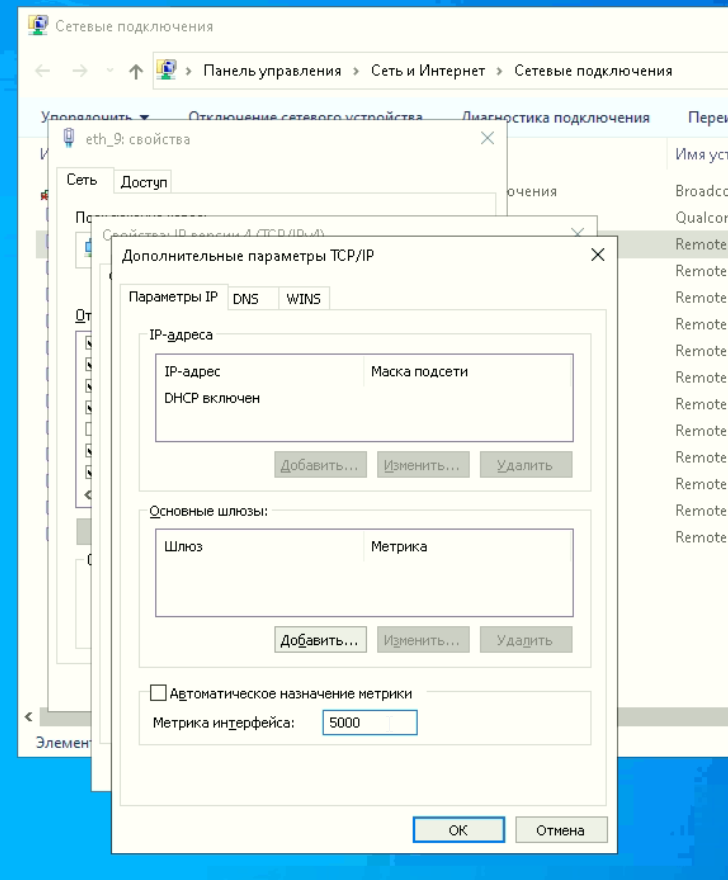
That's all, the connection is ready to use and the main server traffic will go through a channel with a wired Internet, and this connection will not be chosen as the main one. It is important to ensure that the metrics of the secondary connections are higher than those of the primary connection. We assign metric 1 to the main wired connection.