FreeCap and mobile proxies

FreeCap – free software designed to forward Internet connections through a proxy server running on the SOCKS protocol (fourth and fifth generation). This interaction is transparent: all API calls are intercepted and then sent to the destination, but through a proxy. The program will be especially useful for applications that do not support the SOCKS protocol (such as Internet Explorer). In this case, FreeCap will help you transparently perform the necessary operations.
Let's get acquainted in more detail with its features and functionality. Let's dwell on the nuances of use and settings.
Features and capabilities of FreeCap
FreeCap is based on universal DLL injection into third party processes, can work with all versions of Windows: 95/98/ME/NT/2000/XP/Longhorn/Blackcomb OS. It is highly efficient and easy to work with most popular browsers: Internet Explorer, Opera, Netscape, Trillian, Mozilla, MS Outlook Express.
Among its functionality are:
- support for SOCKS protocols, versions V4 and V5;
- setting up authorization in the SOCKS5 protocol;
- the ability to embed into a chain of SOCKS servers;
- tunneling connections through an HTTP proxy using the CONNECT method;
- the ability to configure automatic launch simultaneously with the start of the operating system: significantly saves working time – no manual start required.
At the same time, FreeCap is based on the XP interface with a set of skins that simplify and speed up the user's work. Among the main advantages are a simple and logically understandable graphical construction, ease of use and general availability – the program is free and can be easily found in the public domain.
By choosing FreeCap, you won't have to look for other programs that could provide stable work with different services: all your actions on the network will automatically be redirected through a SOCKS proxy. In turn, this will provide an instant connection, simplify work, ensure anonymity and security of work, guaranteed access to all resources, including those blocked in your country. With its help, you can work with multi-accounts, use automated software to promote pages on social networks without the risk of blocking.
FreeCap configuration steps
In order to make the appropriate settings and connect FreeCap to work, you will need to enter the access settings for the proxy servers that will be used in the work. At this stage, the user will be required to:
- Upload the application to be soxified. You just need to find the FreeCap program freely available on the Internet, download it to your personal computer and run it.
- Configure applications to work with FreeCap.
- Configure the proxies themselves directly. The program assumes the use of public servers (they can be found through the option Proxy Search (Proxy Search) or List Proxies (List of proxies)), filtering those that satisfy your requests by country. You can also connect personal servers to work, which will be a more reliable solution in terms of security and efficiency of subsequent work. On the MobileProxy.Space service you will find individual proxies with unlimited traffic per channel. That is, only you will use them – no risk of blocking, guaranteed anonymity and stability of the network.
With the first point, everything is clear and none of their users should have problems downloading the program. But let's dwell on points 2 and 3 in more detail.
Adding applications to FreeCap
After you connect a proxy to the program, you will need to add those applications with which it will work. We perform actions in the following sequence:
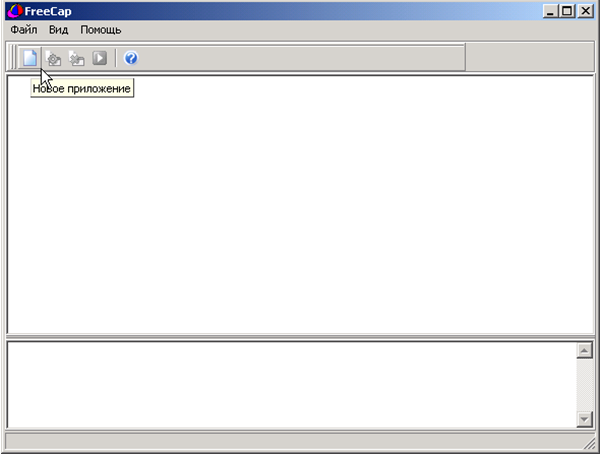
- Launch the FreeCap program. An empty working window opens in front of you.
- Click on the icon with the image of an empty sheet of paper – "New App".

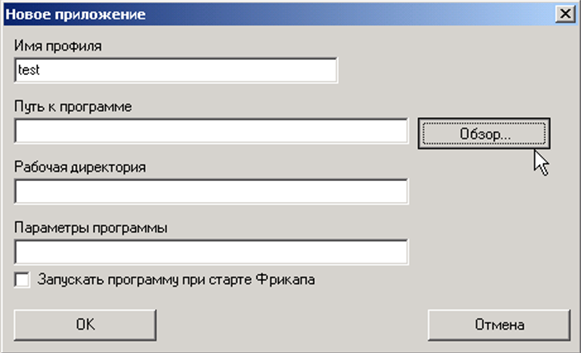
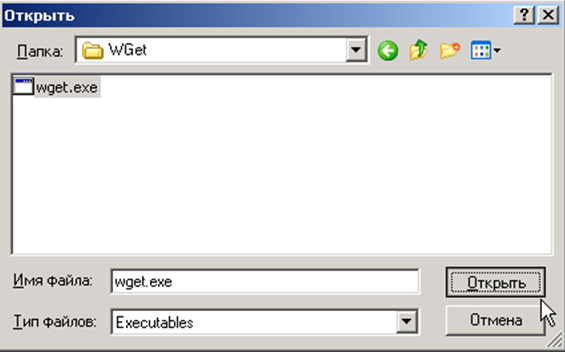
- In the window that opens, you must fill in all the boxes. The relevant information can be entered either manually or using the "Browse" button. Here we indicate the path to the application you need and click "Open". FreeCap will automatically write all the parameters in the "New Application" windows. Click on "OK" to save the changes.
If you plan to work with several programs through FreeCap, then you need to repeat all these settings for each of them.
Connecting proxy to FreeCap
To connect personal proxies to FreeCap, do the following:
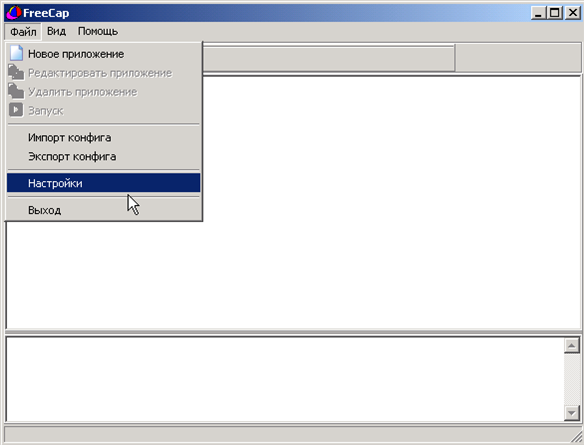
- Launch the FreeCap program. Click on the "File" tab, select "Settings" from the drop-down list.
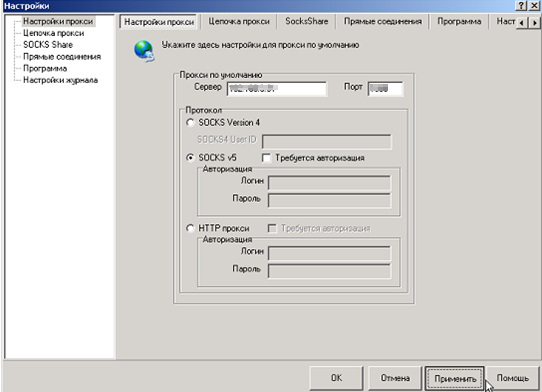
- First option here – "Proxy settings". In the "Default Proxy" box enter the IP address of the proxy, and in the adjacent – its port.< /li>
- From the proposed list of protocols (SOCKS Version 4, SOCKS Version 5, HTTP), select the protocol that will be used to interact with the network. Click on the "Apply" button.
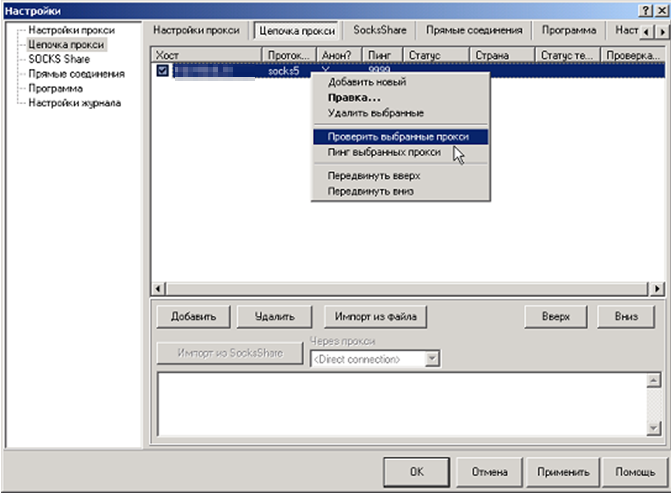
- Go to the Proxy Chain tab. The working window of the program will already display the proxy that you just added. We right-click on it and select the "Check selected proxies" function from the drop-down list.
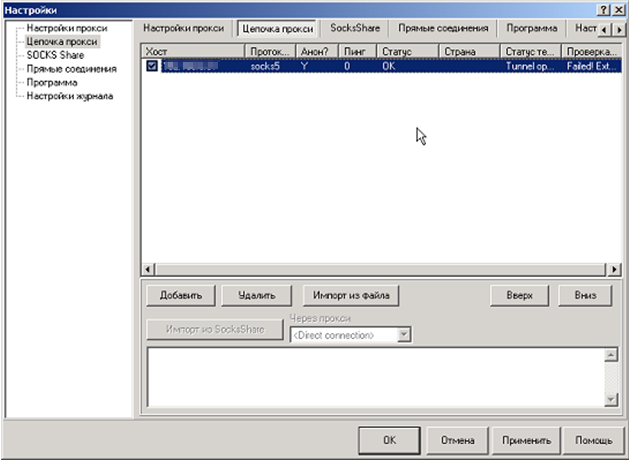
- Wait until "OK" appears in the connection status column.
Now you can go to work without fear of regional blocking, ban, and other potential restrictions. Simply click on the green button with a white triangle – "Launch".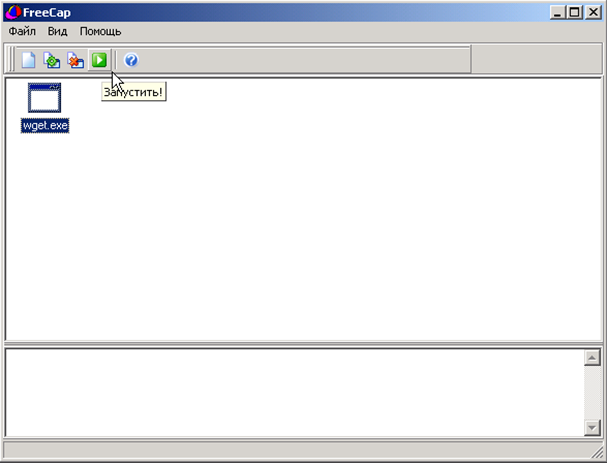 < /p>
< /p>