Setting up CCProxy
CCProxy – a proxy-based program designed for use with the Windows operating system. It automatically connects to one of the intermediary servers located in the Czech Republic and passes all traffic through itself. The end user receives this data in compressed form, decompresses it and then transfers it in his own working program. As a result, when browsing pages, up to 70% of traffic is saved, and the connection is anonymous.
Let's take a closer look at the functional features of CCProxy. Let's consider in detail the nuances of setting up the program for stable and efficient operation.
CCProxy features
CCProxy – multifunctional software capable of compressing traffic in GIF and JPEG formats. When working with it, search engines will only see the technical data of the proxy server (IP address, geolocation, etc.), which provides the user with anonymity and connection security, and allows you to bypass regional blocking.
Among the main features of the CCProxy program, it is worth highlighting:
- support for a huge number of working protocols: HTTP, HTTPS (Secure), SOCKS4/5, Gopher, Telnet, NNTP (News), FTP, RTSP;
- the presence of built-in caching, Internet filtering, cascading;
- separation of user rights, control over traffic, generation of reports on network access, static reports with bandwidth indicators;
- support for NetTerm access and the Internet (using the Telnet server), Outlook, Eudora and other mail applications;
- Increased Web/IP/MAC/IP range, scheduling automatic connection and disconnection, etc.
The program has a complete set of tools for access registration, comprehensive monitoring and ensuring stable access to the network. It also provides the possibility of cable, Wi-Fi-connection, DSL-exchange. Using CCProxy you can manage accounts and bandwidth, manage time, filter content.
CCProxy configuration features
CCProxy – completely ready to use software. You can just say it, install it on your computer and use it based on the basic settings. But if you want to get the most out of using a proxy server, if you want to make your work more comfortable and efficient, increase labor productivity, you need to perform a number of additional settings:
- Set configuration.
- Set permissions for using mobile proxies.
- Set custom settings.
We will dwell on each of these stages in more detail.
Step 1: Configuring
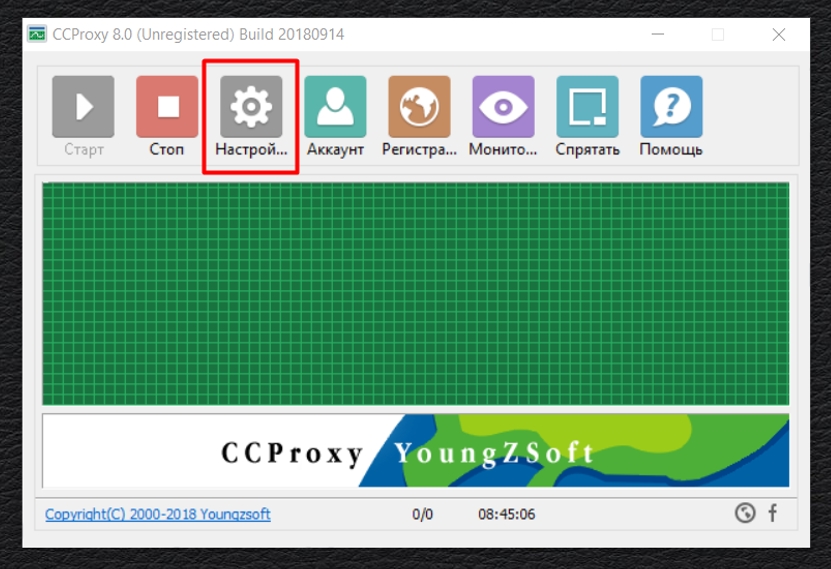
Download the program, download it to your PC and run it. Next, we perform the following actions:
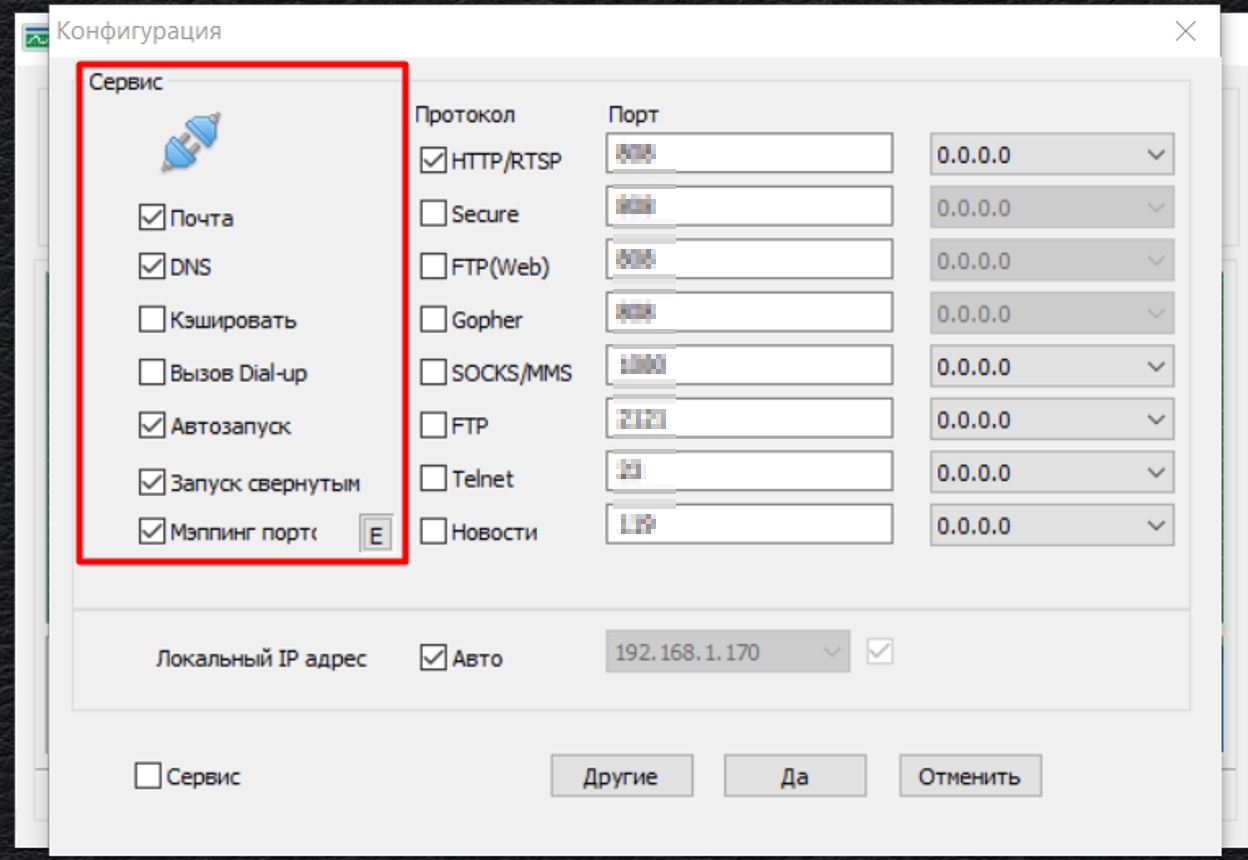
- Go to the "Options" section; in the main window of the program. Find the gear icon – this is the "Settings" tab we need. We go into it.

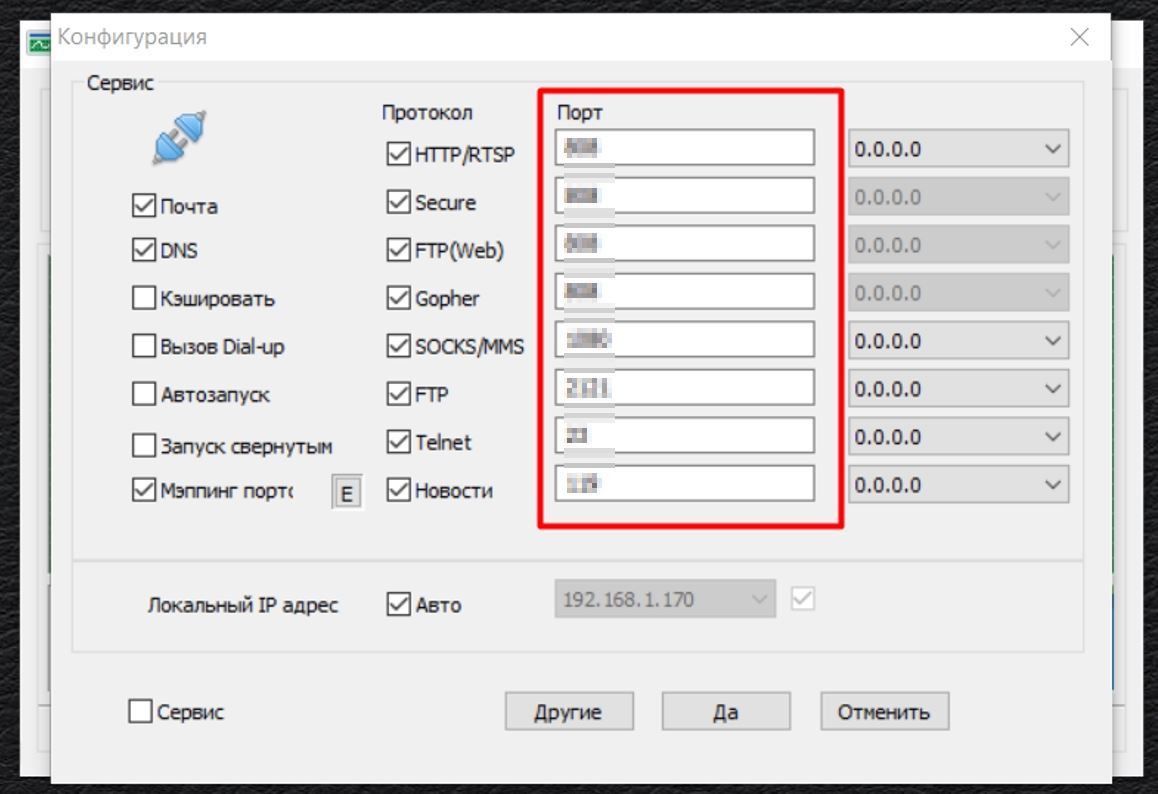
- A window with working tools of CCProxy opens in front of you. Replace the standard ports offered by the program with unoccupied ones.
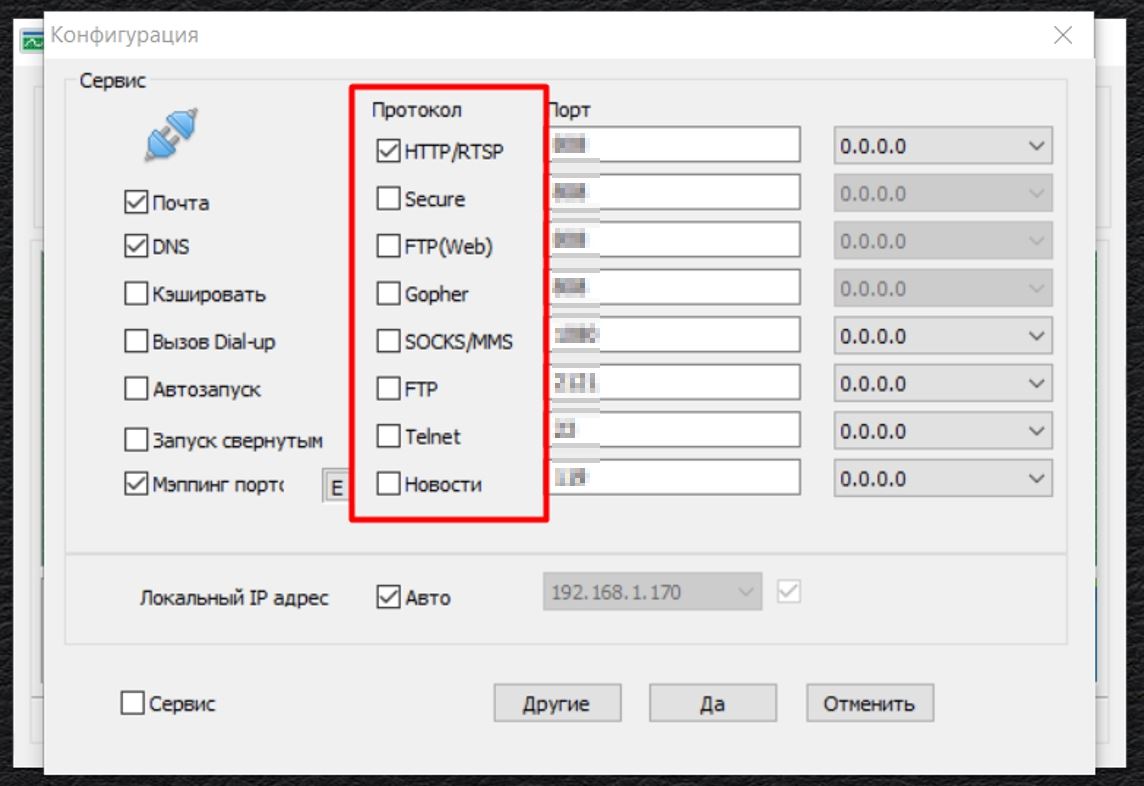
- Check out the list of protocols that the program offers for further work. Uncheck the ones you don't need. So, if you have the most common work with the browser, it will be enough to use the HTTP protocol or its secure version HTTPS. If your next steps will involve uploading files to your own hosting, then you should also leave the FTP protocol. If necessary, you can leave all types, but this is not practical.
- The actions similar to the previous ones must be performed in the additional settings block (mail, DNS, caching, etc.). Leave only what you will use. You can change these settings in the future if needed.
This completes the first stage of settings. We come to the second.
Stage 2: set permission to use mobile proxy
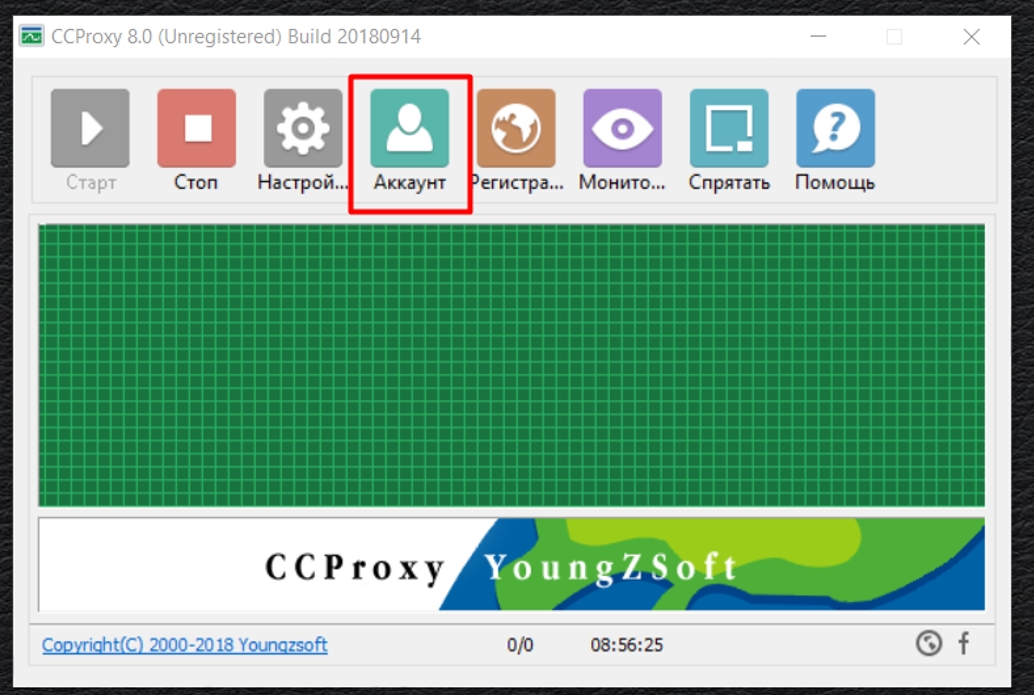
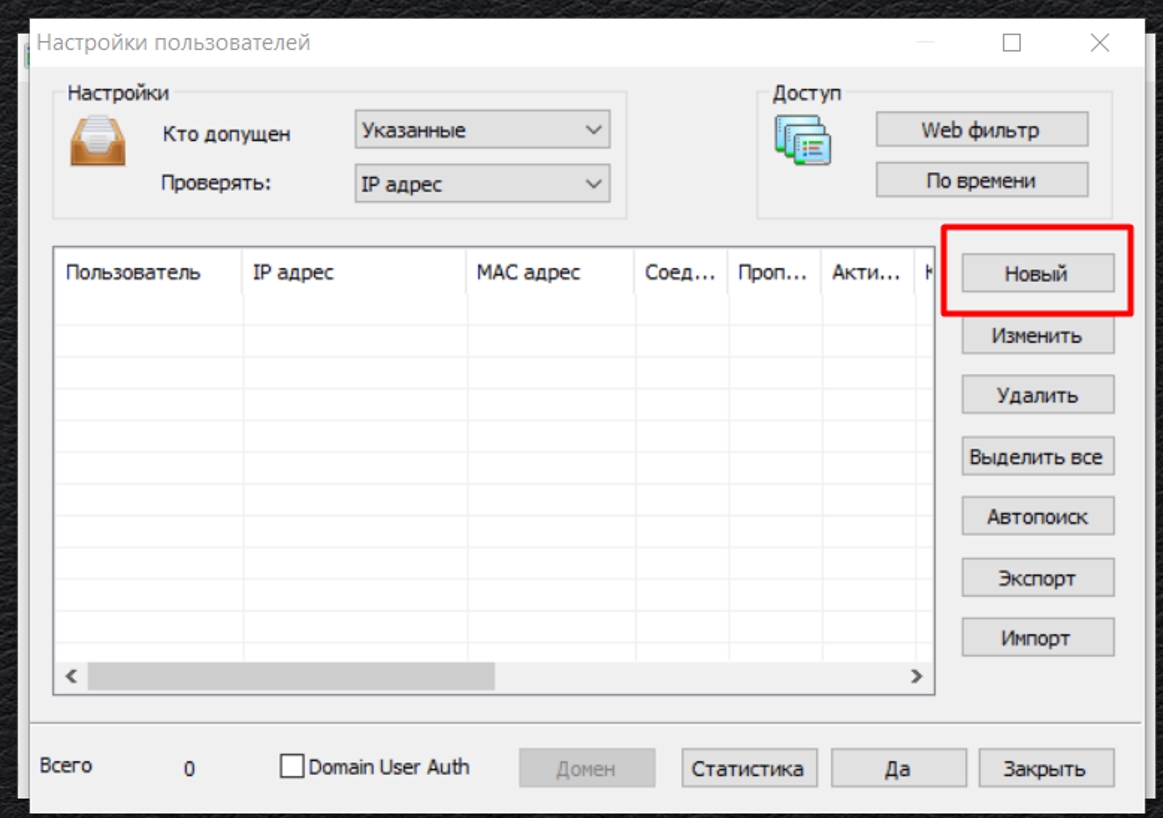
If you do not set restrictions on the use of a proxy server, then other people will be able to use it together with you, which is highly undesirable. The main task of this stage of settings – create permission to use a proxy server, that is, set up a pass that provides access only to you. The work is done in the "Options" section:
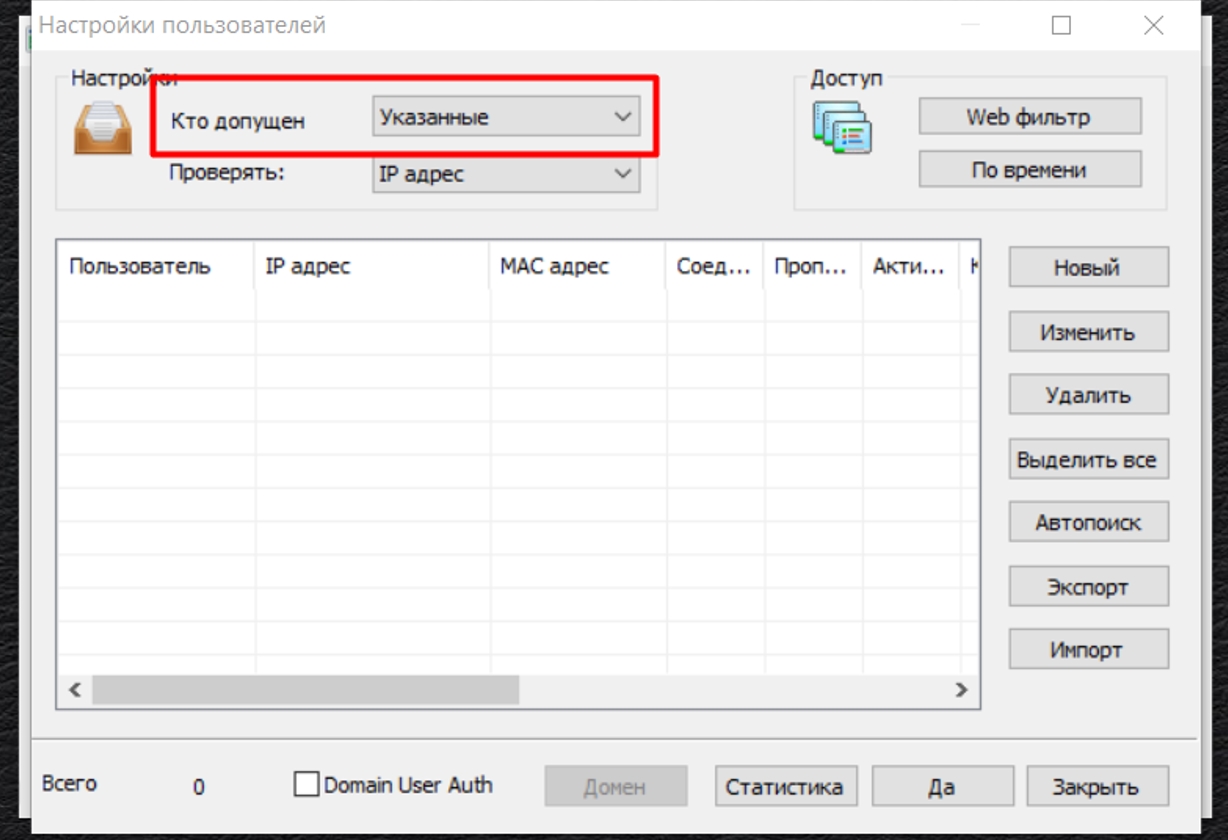
- Find the "Account" icon. The "User Settings" block opens.
- In the line next to the inscription "Who is admitted" select "Specified" from the proposed list.
- Below is the line "Check". Here you yourself choose the option from the proposed one, which will correspond to the features of the upcoming work. There are 6 authorization options here:
- IP address: it is assumed that only those users whose addresses you specify at this stage will have access to the program;
- MAC address: only those whose MAC addresses will be given access will get access;
- Username/Password: persons who enter the required username and password will be able to enter the program and use it;
- Username/Password+ P: in addition to the username and password, you will also need to enter the IP address of your PC;
- Username/Password+MAC: to gain access, you will need to enter your username, password and MAC address;
- IP+MAC: Only users with matching IP and MAC addresses can access.
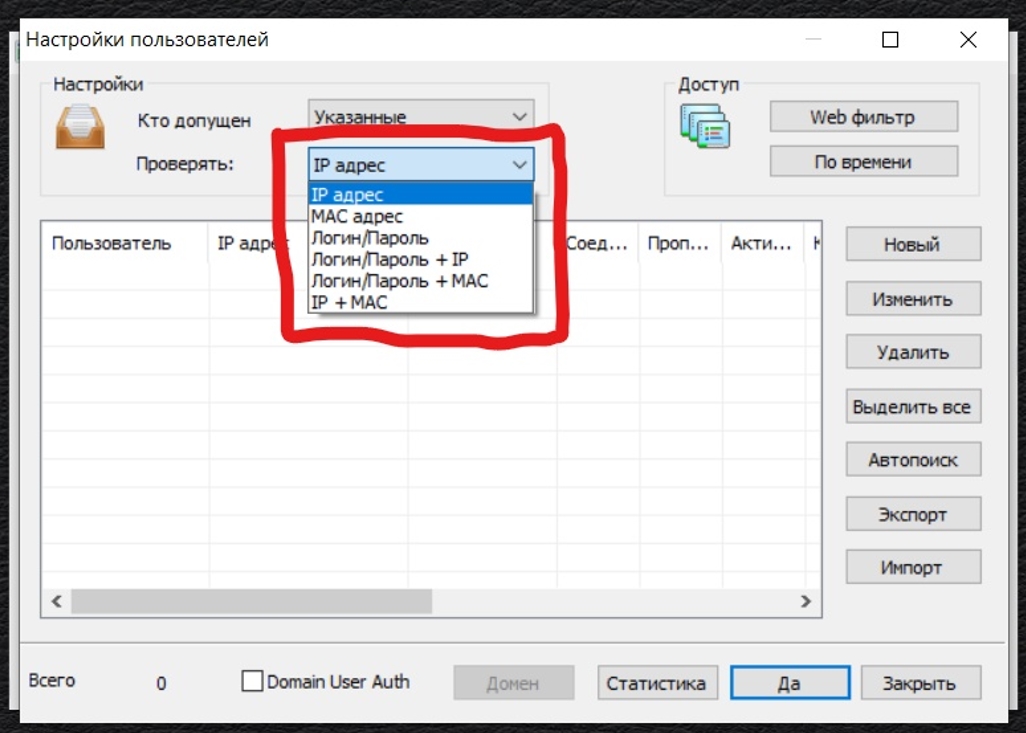
Hint: if you are using IP and/or MAC addresses, you need to know this information. You can find them in the working program itself by clicking on the question mark icon (located on the same line as "Settings", "Account").
Stage 3: Specifying User Preferences
After you decide on the optimal authorization method for yourself (the final option must be indicated in the "Check" line), perform the following actions:
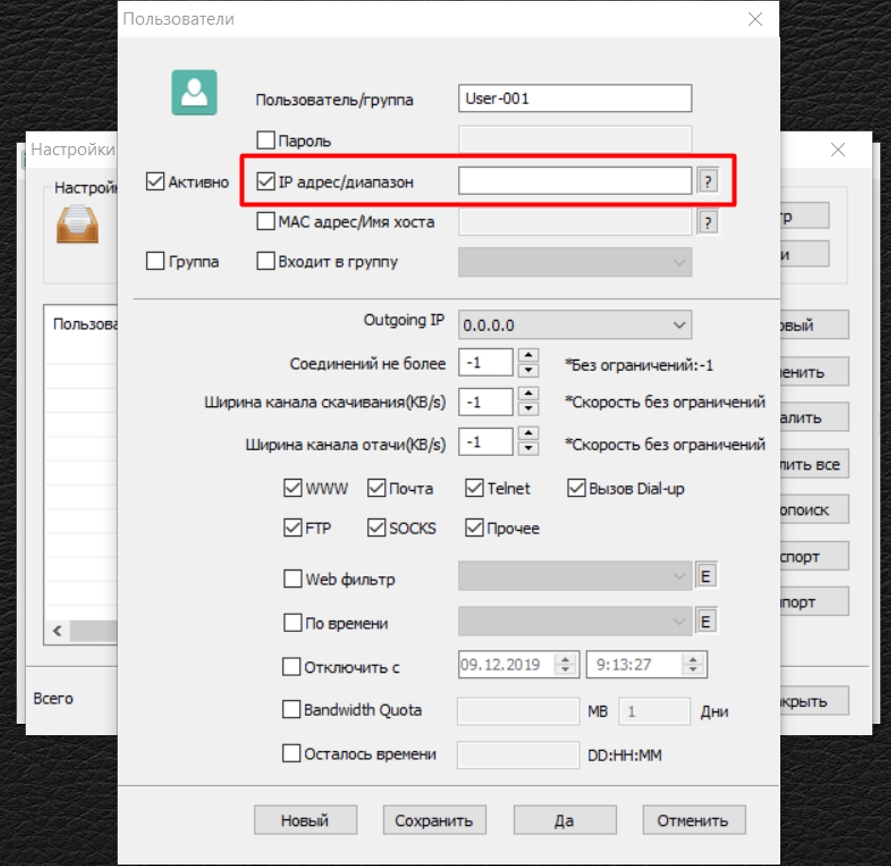
- Click on the "New" button located on the right side of the working window – first in the vertical list of tools.
- A new window opens, where you will need to enter the relevant information. The appearance of the window itself will depend on which authorization option you choose. In any case, only basic information should be indicated here. That is, if you chose the Login / Password + MAC option, then you will need to specify these parameters in the appropriate boxes. Leave all other settings as default.
- We have already said that CCProxy allows each individual user to set restrictions on the use of protocols. That is, here you can specify the protocols that will be used by the person whose access data you just entered.
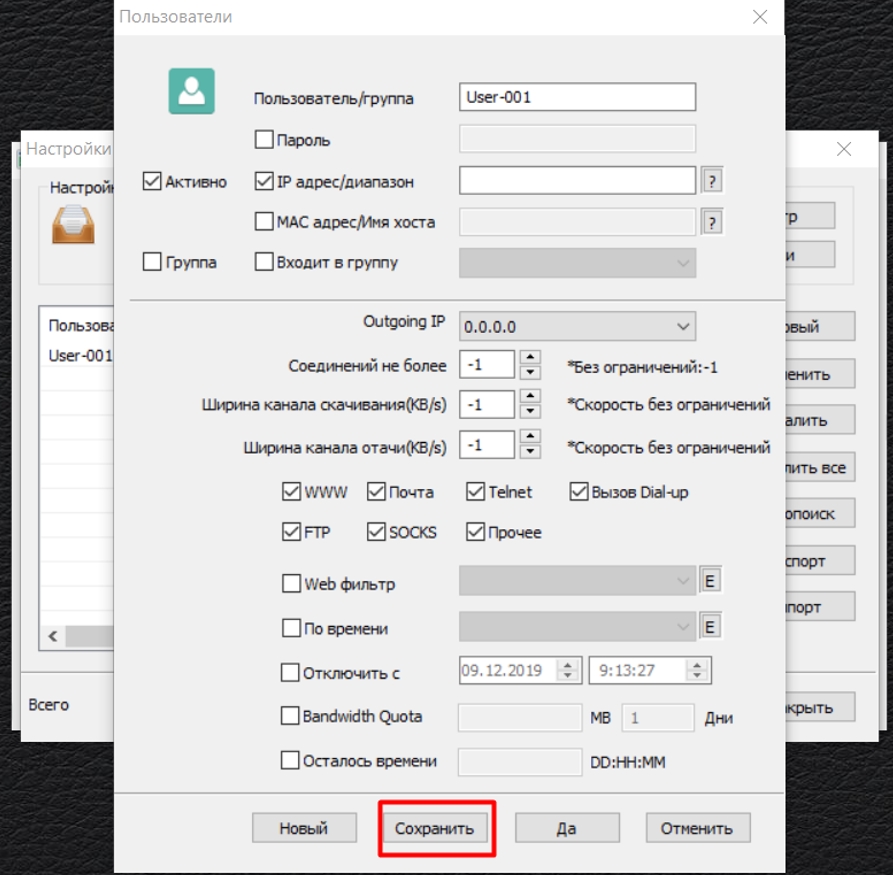
- Press the "Save" button, confirming all the specified parameters.
- If you want to set up work with CCProxy for several users, then you need to click on the "New" button again; in the panel on the right and enter the relevant information as described in paragraphs 2 and 3 of this stage. After completing the settings, click "Yes" at the bottom of the window.
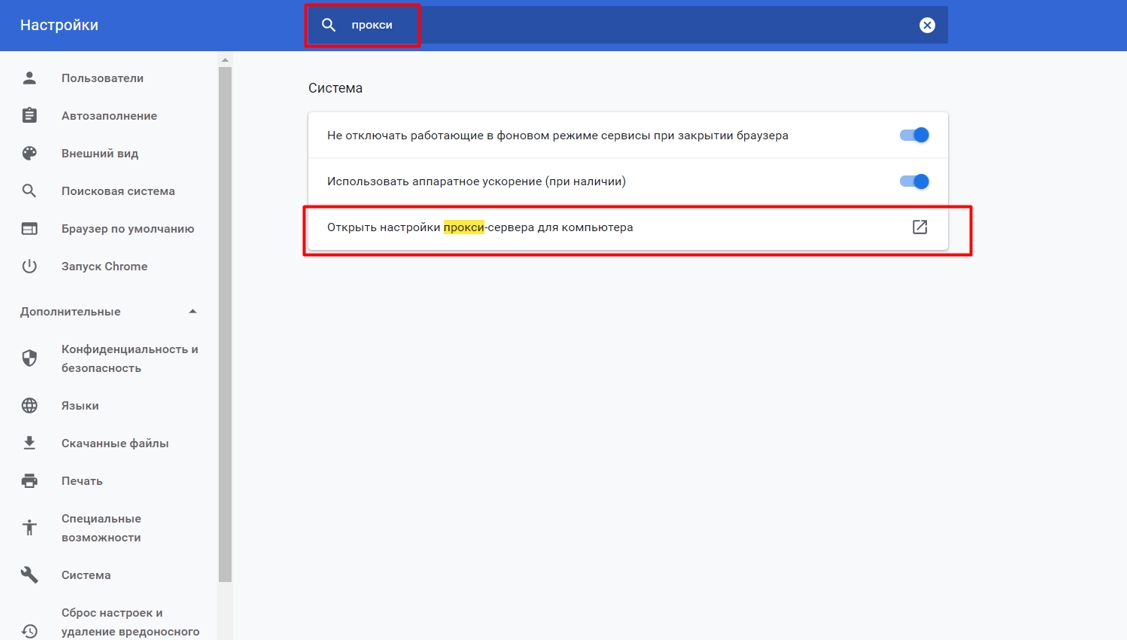
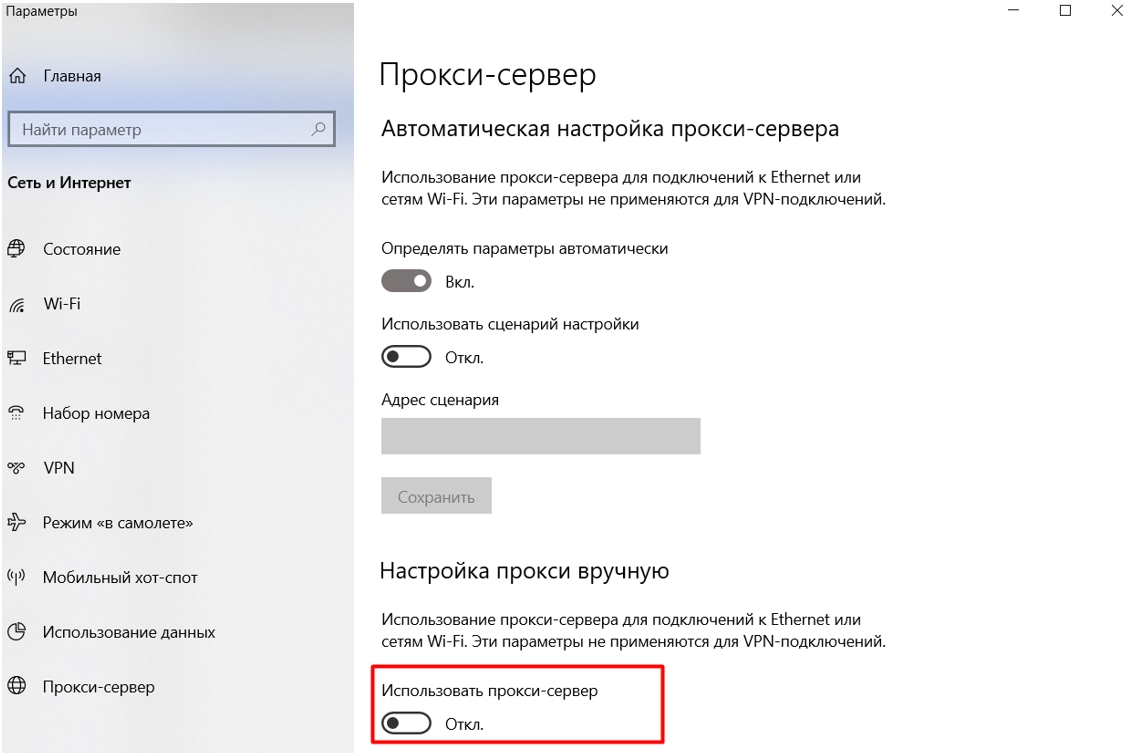
Please note that the person you give access to use your proxy server will also need to make some settings on their PC. In particular, he needs to go to the browser settings and enter the IP address and port of your mobile proxy there. This information is separated by a colon on a single line. To find the parameters you need, it will be enough just to write the word "proxy" in the browser search engine; and click on the search icon. After that, the program will automatically redirect you to the proxy settings block on your PC.
Here you need to click on the line that says "Open proxy server settings for the computer." A new window will open. First of all, move the slider to the "ON" position. in the "Use a proxy server" block to allow the use of a mobile proxy. After that, the windows will become active, in which you will need to enter the IP address and port of the server. Where can I get this data above (in the "Options" section, then "Settings" of the CCProxy program).
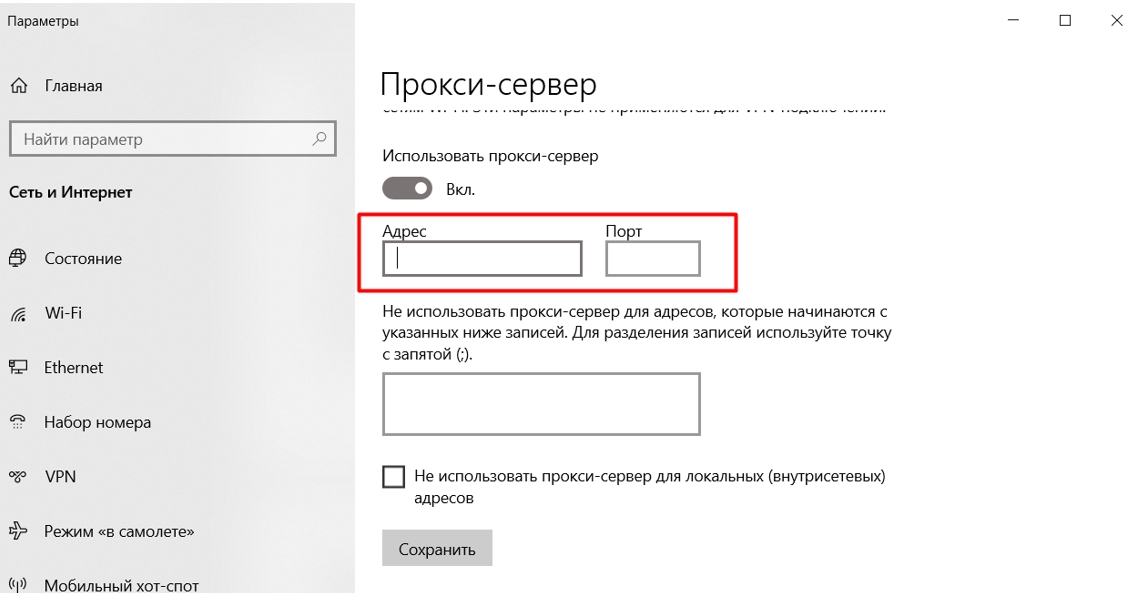

Everything. This work has been completed. You can switch to using CCProxy, discovering unlimited possibilities for your work.