Setting up Proxifier for macOS with mobile proxy
Proxifier — is a powerful program for redirecting Internet traffic through proxy servers. It allows you to work with SOCKS and HTTP(S) proxies, supports rules for flexible routing and is ideal for bypassing blocking, anonymizing traffic and testing network applications.
In this article, we will look at how to configure Proxifier on macOS to work with a proxy from mobileproxy.space — service that provides mobile proxies with IP rotation and high anonymity.
Installing Proxifier on macOS
-
Download and install Proxifier
-
Go to the official website and download the version for macOS.
-
Open the downloaded
.dmgfile and drag Proxifier to theApplicationsfolder. -
Run the program and, if necessary, enter the administrator password to install the system extensions.
-
-
Activating Proxifier
-
If you have a license, enter the key in the appropriate field.
-
The free version has limited functionality (you cannot save settings).
-
Getting a proxy from mobileproxy.space
-
Registering and purchasing a proxy
-
Go to mobileproxy.space and choose the appropriate one tariff.
-
After payment, you will receive connection data:
-
Server IP address
-
Port
-
Login and password (if authorization is required)
-
-
-
Proxy types in mobileproxy.space
-
HTTP/S — suitable for web browsing and most applications.
-
SOCKS5 — universal protocol that supports TCP and UDP.
-
Configuring Proxifier to work with mobileproxy.space
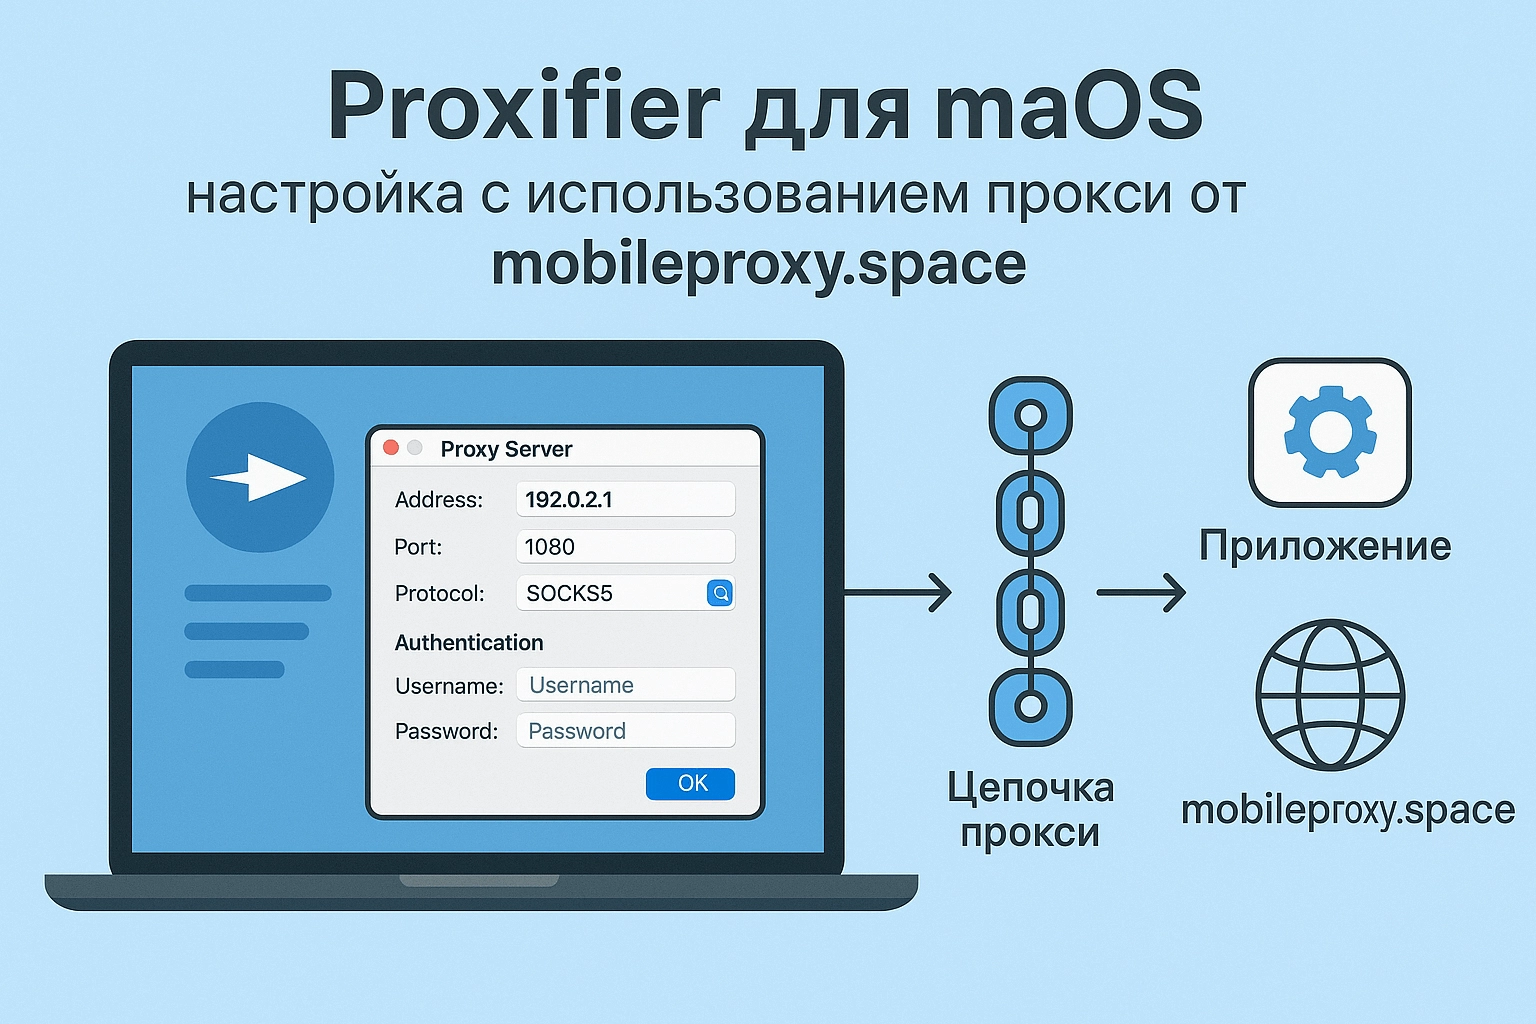
1. Adding a proxy server
-
Open Proxifier and go to the menu Profile → Proxy Servers (or press
Cmd + ,). -
Click Add and enter proxy details:
-
Address: IP address from mobileproxy.space
-
Port: Proxy port
-
Protocol: Select HTTP or SOCKS5
-
If authorization is required, check Enable authentication and enter login/password.
-
-
ClickCheckto check the connection. If the status isWorking, the proxy is active.
2. Setting up rules (Proxification Rules)
Proxifier allows you to flexibly manage traffic:
-
Forward only certain applications(for example, a browser or Telegram).
-
Exclude local addresses and trusted sites.
-
Go toProfile → Proxification Rules.
-
Delete the default ruleDirect(if you want all traffic to go through the proxy).
-
Create a new rule:
-
Name: For example, "All via mobileproxy"
-
Applications: You can select specific programs or leave Any.
-
Target hosts: Leave Any, or specify domains (for example,
google.com). -
Action: Select the added proxy.
-
-
Save changes.
3. Checking the work
-
Open your browser and go to https://mobileproxy.space/my-ip.html.
-
Make sure your IP has changed and matches the proxy from mobileproxy.space.
Additional features of Proxifier
-
Proxy Chains — you can set up sequential use of several proxies.
-
Traffic logging is useful for debugging (menu View → Log).
-
Flexible DNS settings — choose between system DNS and DNS proxy.
Why mobileproxy.space?
-
Mobile IPs — are less likely to be blocked because they look like real users.
-
Automatic rotation — IP changes by timer or on request.
-
High speed—low ping and stable connection.
Conclusion
Proxifier is a convenient tool for managing proxy traffic on macOS. In conjunction with mobileproxy.space, you get anonymity, bypassing blocking and a stable connection.