Introducing the Puppeteer library

Puppeteer – one of the Node.js libraries, whose work is aimed at programmatic browsing of the web. It is widely used by those who plan to create a Node.js parser from scratch. Puppeteer – the closest analogue and competitor of the Cheerio library. Now we will take a closer look at what this library is, what functionality it has, its advantages and disadvantages. We will also take a step-by-step look at the process of creating a parser on Puppeteer. We will show you how to organize safe work when parsing data using mobile proxies.
Puppeteer library functionality
Puppeteer has a lot of features that users can appreciate in practice. Here are the main functionalities of the library:
- Puppeteer provides a set of tools for browser automation. You will be able to access the search engine engine (mostly Chromium is used. By the way, this is not provided in Cheerio. Access to the DevTools protocol to control Chrome.
- Can execute JavaScript, allowing you to parse even dynamic pages, such as single-page sites (SPAs).
- The Puppeteer library can interact directly with websites. This means that she can literally press buttons, enter data, fill out standard input forms, and so on.
- Having an advanced learning curve. It provides a very wide range of functionality. You will often need to use asynchronous code, namely promises/awaits (in asynchronous mode).
- Quick and easy library installation with npm or Yarn. Very high performance.
- Huge set of performance management tools: recording runtime and load performance, throttling CPU performance to mimic performance on mobile gadgets, taking screenshots, and more.
All this allows us to say with confidence that the Puppeteer has a lot of features and conveniences that professionals can appreciate in their daily work.
Advantages and disadvantages of Puppeteer
Among the main advantages that users of the Puppeteer library found for themselves, it is worth highlighting:
- Effective Headless Chrome Solution Headless Chrome;
- simple, quick installation, easy to use, logical interface;
- Legacy support for Node.js >= 6;
- there is support for extensions: as an option, you can set the library settings for using AdBlock and Puppeteer will save you from having to view annoying ads;
- Presence of a highly efficient API for managing a large number of processes.
But, along with the advantages, there are also disadvantages. In particular, this library does not have such top-level functions as synchronization of passwords and bookmarks, hardware acceleration, support for profiles, etc. Significant "minuses" of the library also include software rebranding: all rendering and eviction are carried out directly on the user's CPU. But there is information that experts today are actively working to eliminate this problem. There is also no support for audio and video.
Sequence of steps for creating a parser in Puppeteer
The work of creating a parser in Puppeteer must begin by creating a folder for storing code data, as well as initializing package.json. The folder is created in the classical way. Next, you need to run npm init -y inside the parser or yarn init, depending on what your choice was: npm or yarn. This completes the preliminary work: we have a folder for the code and an activated package.json file. now you can go directly to work with Puppeteer. Here you have to implement the following steps step by step, following our instructions:
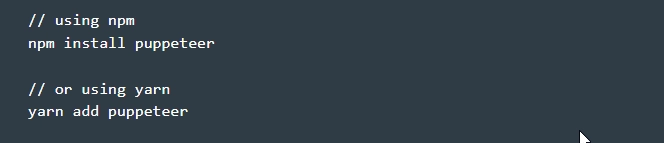
- Install the Puppeteer library on your computer. This is done by running the following commands:

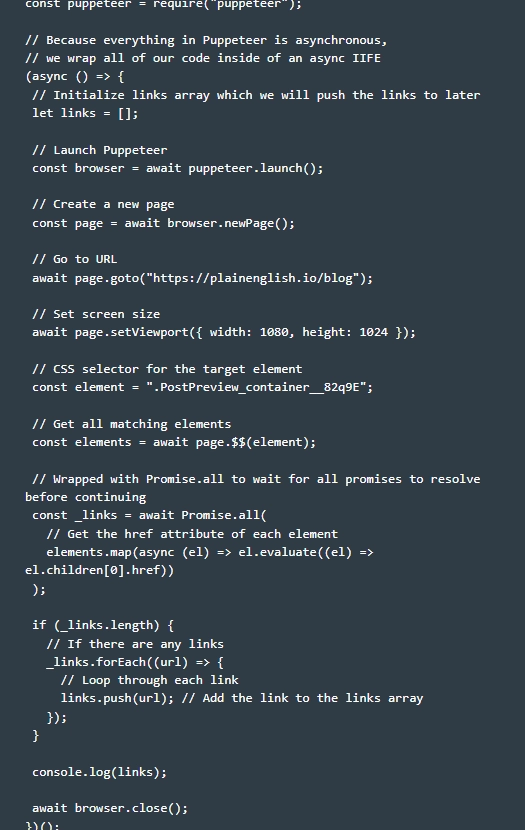
- Preparing the parser for work. We go into the folder that we created in the previous step and create a file in it, giving it the name puppeteer.js. To start parsing web pages with the Puppeteer library, you can use the basic code structure. Please note: the work is performed after the library is already installed.
- Creating an IIFE – function expression with immediate output. Please note: the work with the library is carried out in asynchronous mode, that is, at the very beginning it will be necessary to insert the async option. In practice, it will look like this:
- Now inside the asynchronous IIFE we create an empty array of references. This is necessary so that in the future it would be possible to capture links from the blog from which you plan to collect data. To do this, run the following command:
- Would you like to monitor the library in real time? Then you need to pass the headless: false option as a parameter. You can do it like this:
- Requesting data. At this stage, you need to specify which selector the landmark will be directed to. In this case, it will look like this:
- Launch it. This is the equivalent of querySelectorAll() on our target element. It looks like
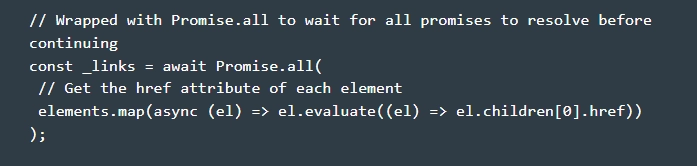
- Perform data processing. At this stage, our elements are already stored inside the main elements, we need to match them all in order to finally extract the href property. This is done with the following commands:
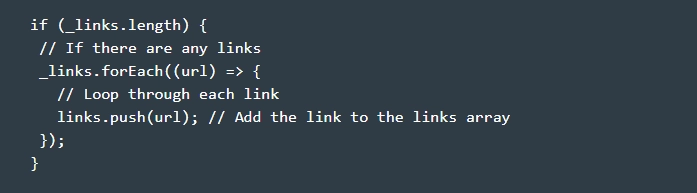
- Please note that in this example we have a parameter such as el.children[0] – is the first child element of the target element, represented as a – the tag that we want to get as a result. Now we go to each of the displayed elements separately and move their values to our array of links. This work will look like this:
- We output links to console.log with console.log(links), and then we close the browser with await browser.close(). Be sure to close your browser! Otherwise, you will just cause the terminal to freeze.
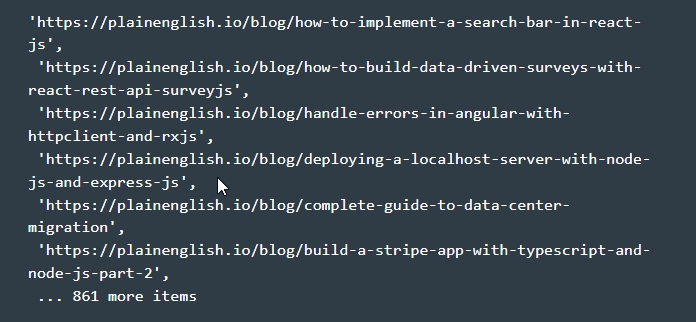
- Displaying the final results. After all the described work has been completed, all you have to do is open the terminal from the parser folder and run node.js puppeteer.js. This command will execute all the code stored in the puppeteer.js folder. Note that this should output the URLs from our array of links to the console. That is, on your screen you should see something like this:


This completes data parsing using the Puppeteer library. Once again, we want to draw your attention to the fact that you have a really powerful data collection tool at your disposal. It contains a huge set of APIs for Web Scraping as well as automating many browser tasks. With it, you will have unlimited possibilities for extracting information from various sites, generating screenshots, including PDF files, as well as solving many other production tasks.
You just need to understand that you will get unlimited opportunities for work only if you additionally connect mobile proxies to work. This tool will provide you with anonymity and security of networking, will allow you to avoid a ban as a result of multi-threaded actions, and will also help you bypass regional blocking established by a particular state at the regional level. That's just in the work it is worth using exclusively private mobile proxies – free servers, due to the general availability, will not cope with the task in any way. You will get more problems from them than solutions.
Choosing the best mobile proxies to work with Puppeteer
If you are in the process of looking for reliable private mobile proxies for working with the Puppeteer library and the Internet in general, we recommend that you pay attention to the offer from the MobileProxy.Space service. The company's clients receive:
- private dedicated channel with unlimited traffic and access to almost a million IP-address pool.
- quick and easy setting of automatic change of IP-address by timer in the range from 2 minutes to 1 hour or forced change of address using a link from your personal account;
- simultaneous operation via HTTP(S) and Socks5 protocols, which is provided by connecting to parallel ports;
- the ability to change the geolocation, the network operator in the workflow.
- 24/7 technical support.
For more information about MobileProxy.Space mobile proxies, current tariffs, we offer here.